


Lace bows were pretty popular in the 18th century. And as it happen my current projects requires one of these multi-layered bows that resemble a flower more than the resemble a traditional bow.
So how to make one:

I got myself some simple cardbord and cut out two identical pieces that had already a fold.

On those pieces I marked a narrow triangle which was vertical to the fold.

I cut out the triangle on both pieces.

Then I cut out another piece to use as a base. I glued the other two pieces onto it.

The upper parts of these two pieces are not glued together.

This gap is really important.

I put a thread through that gap. (Don’t use plain sewing thread and go for something thicker – at least buttonhole silk.) I doubled the thread for stability and hid the ends behind the base.

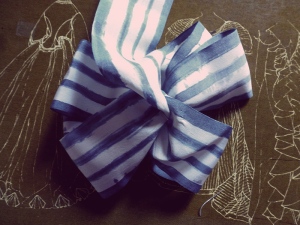
I apologize for the weird experimental silk ribbon.
I put the ribbon through the triangle. (You should consider the material, width and length of your ribbon before you proceed here. If your ribbon material is too soft, it might be wise to starch it beforehand. Otherwise the bow might look very droopy. The wider your ribbon is the larger the bow can be. (A large bow made out of narrow material is a very specific look.) And the larger the bow, the more length you will require.)

I made the bow loops by “weaving” the ribbon through the triangle. (This is where you define the size of your bows. Try to make them even. Unless you want them uneven for some reason.)

I finished looping once I had made the number of bows I had previously decided on.
In this case, I wanted a six-looped bow with no visible ends, so I made four loops and left enough ribbon at both ends to form the other two loops. I could have made six loops straight away and cut off the ends to a minimum but I didn’t because then the “flower” look is much harder to achieve.

I pressed down the middle of loops (in this case with small scissors), grabbed the ends of the thread, pulled them up from behind the base through the gap and tied them together with a simple square knot.

I cut off the ends of the thread.

Then I pulled on the bow loops, so they fanned out. This step is actually really crucial. 1. Because here you define the look of your bow and 2. The loops have a tendency to go back to their original position. Sewing them into place by stitching around the center once you have them in the position you want, might be a good idea.

I should have cleaned up the ends of the ribbon before this.
I took the ends of the ribbon and looped them up and sewed the ends to the center of the bow. (At the back, not the front, obviously.)
If you want loops at the bottom or top of your bow (the “flower” look), this is the best way to do it. The ends of the ribbon are way more flexible than the loops that have been tied down.
View from the back with leftover ribbon
If you have leftover ribbon at this point that you don’t need anymore, you can cut it off. You could also leave it on and use the ribbon as additional decoration.

View from the front
You can hide the thread by wrapping some narrow ribbon around the center of the bow or by puting a button over it. Or just choose your thread color and texture wisely, so no one will notice it anyway.
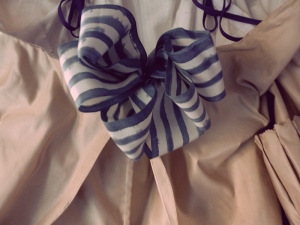
The bow was then positioned awkwardly on the front of an UFO.

This was fun! Thank you!
🙂