Finishing the robe de cour

IMG_5635

I finished the court gown. And yes, I ended up adding a small train.I was out of my original fabric (which I knew from the very beginning) so I just used a gold-colored silk taffeta. I kept it short so it could be actually worn in public without causing accidents, leaving it to drag on the ground a little (it was lined) but not by much. So in the end, it did end up being a grand habit de cour.

Continue reading

Robe de cour sleeves, palatine & petticoat

The sleeves of the robe de cour are kinda same-y everywhere and yet not. Basically, it’s layers of pleated white ruffles, some of go upwards and some go downwards. There is logic to this madness but it’s not entirely uniform. I based my sleeves on Janet Arnold’s pattern and went with the material of that gown’s sleeves – which is silk gauze.

I considered using lace. But there is not a lot of lace that is authentic to use – in fact, authentic lace tends to be of the period. And I have some issues with using things that are of the period for reenacting the period. Especially, if it requires those things’s alteration and possible destruction. I mean some 18th century stuff is pretty indestructible. Textiles – especially fragile lace – is not.

But silk gauze was easy to get a hold of and it is 100 percent authentic and can easily be replaced if it gets damaged. Of course, as always, I abused my fray check to keep the edges from unravelling.

The base on which I mounted the silk gauze is a golden silk taffeta that matches the color of the gown. It became fairly invisible though after all the pleats were attached.

P1050250

The first pleats


P1050256

Pleats with gauze underlayer


P1050259

Sewing with the thinnest silk thread I could find


P1050263

Sleeve before ironing


P1050264

Sleeve after ironing and before sewing the edges together

The palatine – the neckline ruffle – was more of the same, except here my base was the bodice itself.


P1050267

Pleating on the bodice


P1050268

Sewing


P1050271

just putting the sleeve in to see how it looks


Then I got started on the petticoat. The funny thing is that I realized that none of my existing petticoat supports had any chance of not collapsing under the weight of the fabric. So the actual first step was building panniers. This was boring to make, so I didn’t even take pictures.

Then I started on the petticoat for real.

P1050389

The leftover fabric after making the bodice


P1050390

Trying to figure how I can translate that huge skirt into something workable

The petticoat I ended up with was some kind of a cross between Arnold’s pattern and my British princess painting. It’s wider than the British princess (because it turned out that I had just that much fabric.) but much narrower and with more pleats than Arnolds.

P1050398

Halfway to getting somewhere

After finishing the skirt, I added hem protection because I know this fabric. In direct contact with the ground it will not do well.

Then I tried it on:


2

And came to realize that it was missing a few essential features that I didn’t thought would matter. Like that string at bottom of the bodice or some decoration. Or a ladies maid who would help me closing it completely in the back. (Which I didn’t manage there.) Can’t do anything about the latter but the former I started working on.

Robe de cour – the research

Very late into doing the grand habit de cour, I figured out how to access  Janet Arnold’s article on Princess Sophia Magdalena’s wedding dress from 1766, as published in Costume, the journal of the Costume Society, Issue #1 (1967), p.17-21.

I had no idea what I would find in these five pages, maybe some blahblah, maybe that one bare-bones semi-informative cutting diagram that still hangs around somewhere on the internet, maybe some line drawing.

Instead I got this:

pattern-wp

And more, obviously.


Page 17 was a brief description of the dress, page 18 was a line drawing of the bodice with emphasis on the interior (this is the only part of this article that actually can be found on the internet), page 19 is a line drawing of the front and back of the complete dress and pages 20-21  are a cutting and boning diagram of all layers (bodice/petticoat/train) and the gauze sleeves and neckline gauze (palatine).

The only thing that was missing unfortunately was the hooped petticoat (the Livrustkammaren has one, but apparently for a different robe de cour). So if you want to do a robe de cour and need a pattern… well, you can try to find an old copy of this issue of Costume (apparently there was a re-issue) or you can become a member of the Costume Society and grab a digital copy of any of their journal’s back issues.

(Which by the way have other nice patterns, like Janet Arnold’s pattern for the 1660s gown in Bath’s fashion museum or some really intriguing original non-Norah Waugh boning layouts for 18th Century stays in one of their 2000s issues.)

So what does this mean for my robe? Well, first of all my boning layout is pretty good. The major differences are that the boning layer and the fashion layer are not identically cut and that there are more additional bones in the tabs (I don’t know how that works actually – I couldn’t have fit more in mine. Edit: the bones are split vertically in the tabs. Reading is  always key.) And that on the back of the shoulder straps there are a few horizontal bones. Also the fabric is finely corded white silk. Which mine isn’t.

Things that I got right: I have 5mm wide bones, Arnold says the bones in the bodice are 3/16 inches wide which translates to 4.7625mm which is extremely close. 0.24mm is so small that I cannot actually find a good comparison, even the thickness of your fingernail is likely to be greater.

My boning layout in general is pretty on actually. Adding the fashion fabric tabs independently of the main part of the fashion fabric is correct. Adding interlining is good (although I could have added more.) Sewing down the seams is also correct.

All in all, there is no major snafu.


So what does this mean for the rest of the gown?

Continue reading

The finished court gown bodice

15


Before I start with the story of how I got there, I want to talk about what I am actually doing.

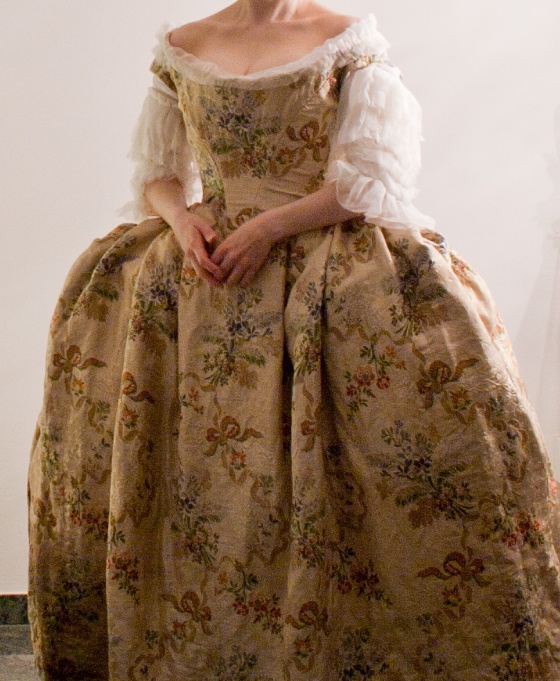
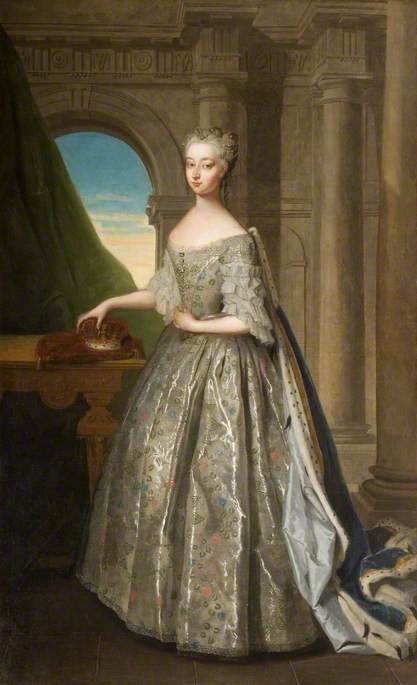
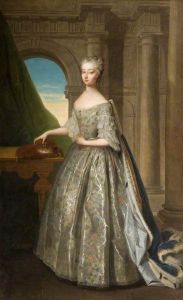
The concept of a court gown seems so easy to define – until you ask “which court”. Mine is obviously inspired by a painting of a British princess of the 1720s, so the answer should be pretty obvious.

(c) Hertford Town Council; Supplied by The Public Catalogue Foundation

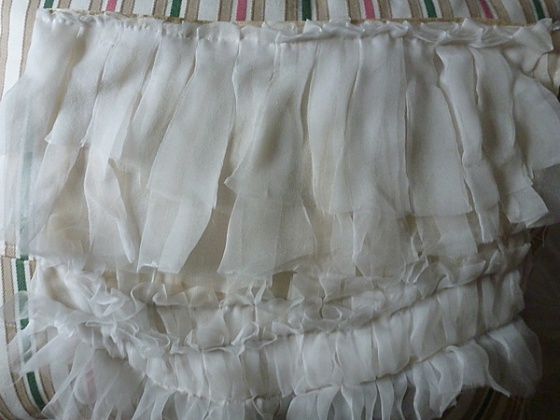
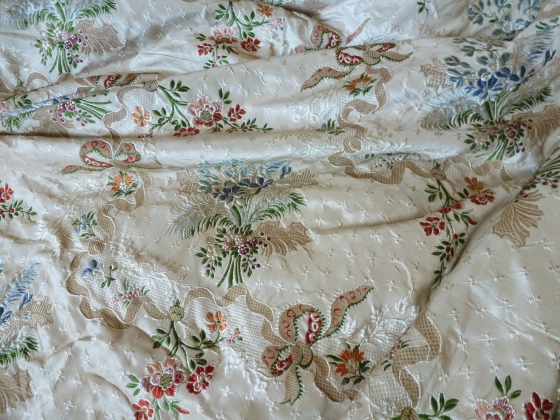
I know I have posted this before.

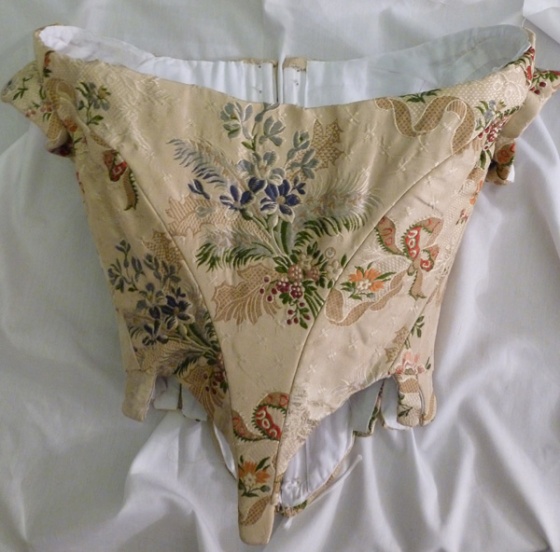
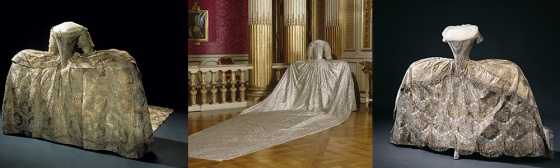
The court gown that people do think of when they actually bother to think about it all, is the court gowns that still exist in their complete form – the three in from the Swedish Royal Armoury. They are not merely court gowns – each is by all definitions of the term a “grand habit de cour”, the court gown as worn by the French court.

00

This would be also a good place for some studies of the Russian 18th Century court gowns, some of which also appear to be grand habits. But good luck finding info on those.

The French Court was very wasteful when it came to fashion. There is a reason why no other French court gown has survived in its entirety – it was absolutely unthinkable to wear one twice. Madame de Polignac had to stay away from a wedding once because she couldn’t afford to wear a new grand habit.

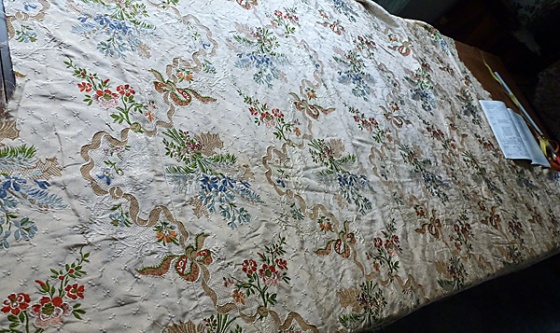
That also meant that they were not meant to last. The description of their decorations in the later 18th Century sound more like still life paintings (even fake vegetables decorated those big skirts) than textiles and were thus pretty fragile. The Swedish gowns come from an early era were the fabric was the eye-catcher and decorations were not much of an afterthought.

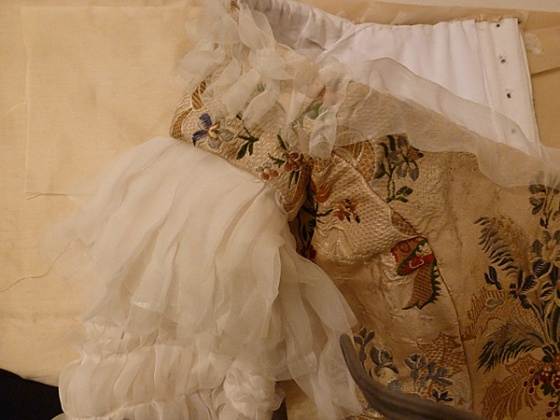
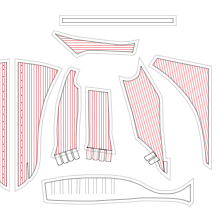
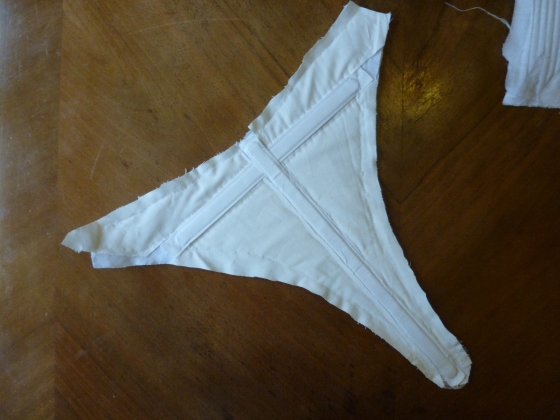
The court gown in France consisted of three main parts: the boned bodice, the petticot and the train. It was pretty mandatory to wear them with double-sided sleeve ruffles, the palatine (the lace/silk gaze around the top of the bodice) and high heeled mules. The width and shape of the petticoat varied, depending on the fashion. From 1730 onwards though, the petticoat was pretty big.

I will be honest about my gown  – I have fabric for a petticoat (not a super-wide one, mind you) but I don’t have fabric for the train. And to be even more honest – I have no interest in recreating a train.

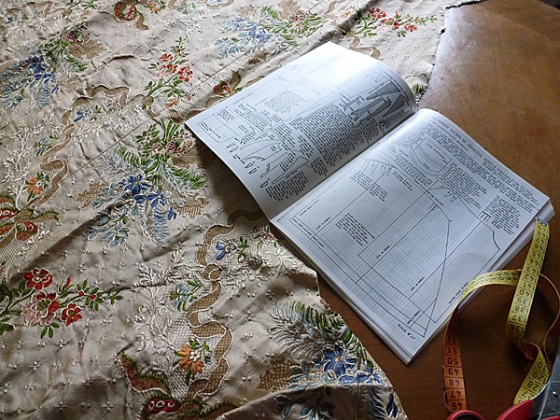
Pattern-wise, a train for a Grand Habit is the second most simple 18th Century garment you can make. (#1 is a fichu.)

21

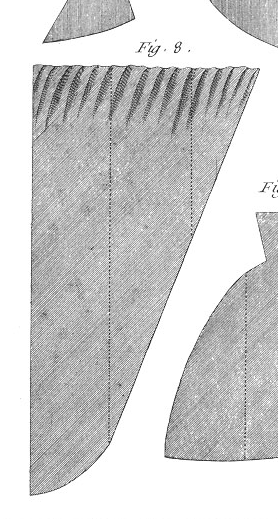
If it looks like an overgrown stomacher, it must be a train.

Even a shift is more difficult. I feel not challenged by making a train, yet I would feel very challenged wearing one. And – lucky me – my inspirational dress has no train.

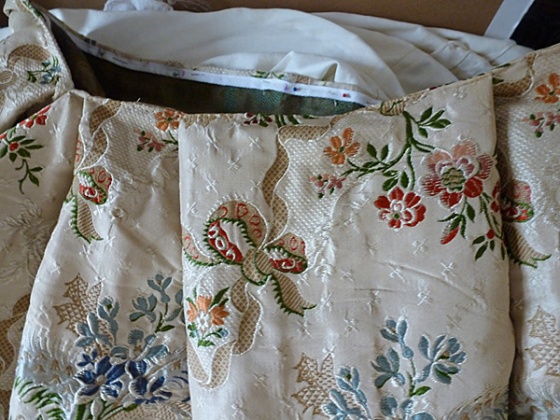
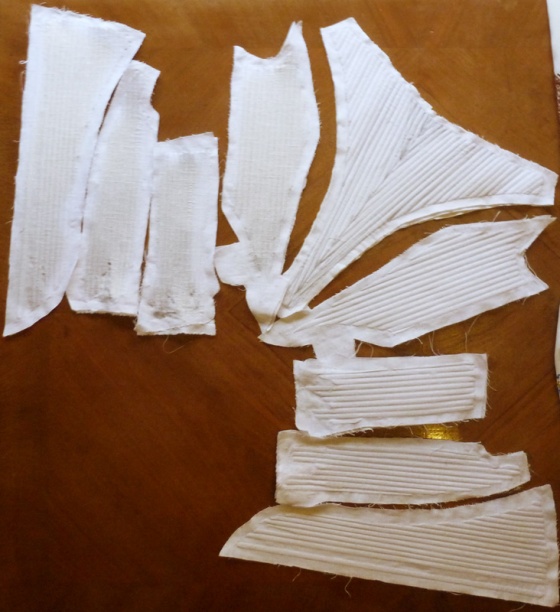
And also…. lucky me, I have finished what makes the grand habit so little fun, pattern-wise…

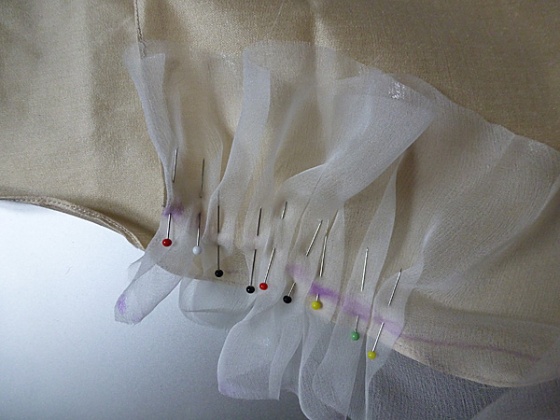
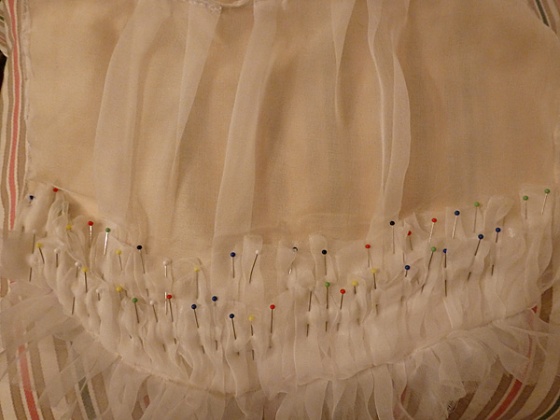
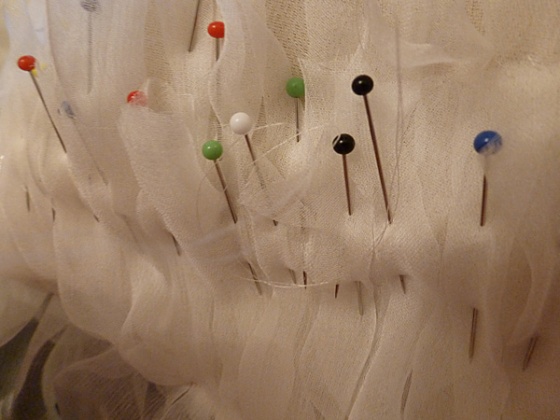
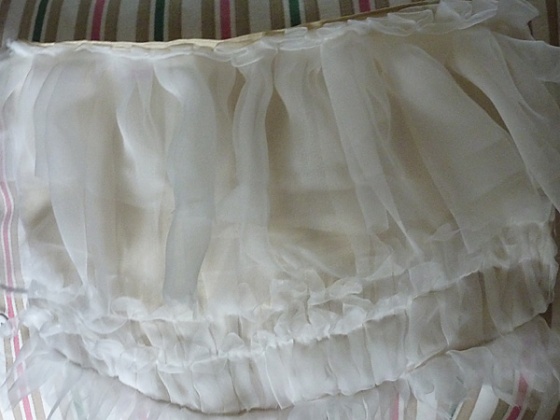
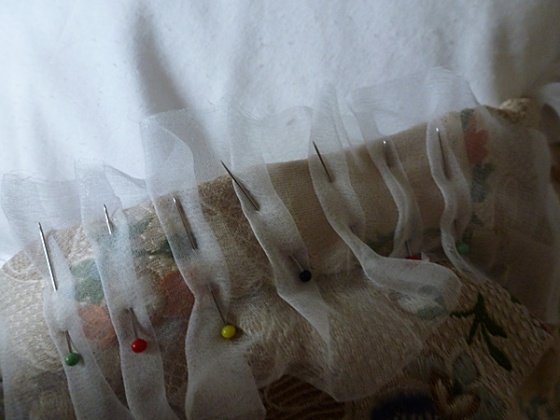
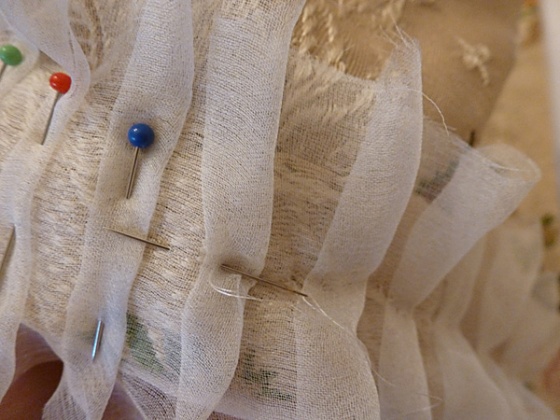
So here is what has happened since I started putting the boned pieces together… Continue reading

A robe de cour

I always wanted  to make a grand habit de cour / robe de cour / court gown but there were a lot of arguments against it.

  1. There is no easily available pattern, the only existing pattern is a low resolution scan on the internet that does not bother with a boning layout, showing the tabs or whatever layers are necessary.
  2. I’ve seen a fantastic re-created court gown last year but was not as wowed as I thought I ought to be. Which was a bit weird because on one hand it was with little doubt one of the most elaborate 18th Century reproductions that exist. On other I wasn’t into it. Which I took to mean that I wasn’t into the whole concept of the robe de cour.
  3. The material. You can’t do a over-the-top court gown with just some plain silk taffeta and then call it a day. So either you deliver some awesome trimming or you need some special fabric.
  4. The effort. You basically make a fully-boned pair of stays that can only be used for one dress – and that’s just the starting point.


And then this fabric arrived at my door step:

P1050146

It’s a vintage piece and it weirdly pre-cut. The short version of this story is that it’s way too nice to not use it for a big gown, and yet there is not enough of it to use it for a traditional 18th Century gown. But you can cut the bodice of a court gown and still have enough fabric for a 1730s type of court gown petticoat.

Something like this:

(c) Hertford Town Council; Supplied by The Public Catalogue Foundation

Princess Anne (1728) by Philippe Mercier – Hertford Town Council; Supplied by The Public Catalogue Foundation

This seem like a contradiction until you realize that piecing this pattern and fabric is a terrible idea.

And since I hate fabric stashes (I hoard enough stuff, I don’t need fabric for something I’ll never make on top of that.), I decided to take the plunge and make a robe de cour.

The first step was taking that low-res pattern and re-work it so it has a boning layout and actually fits me. I did some retro-engineering based on an x-ray of a court dress in Sweden and one of Norah Waugh’s early 18th Century stays to figure out the most likely boning layout. Then I started measuring that one pair of stays that fits me well and dropped my research and numbers and  that low-res scan into Adobe Illustrator. I ended up with a pattern that has actually worked out pretty well so far.

Bildschirmfoto 2016-01-05 um 18.44.19

I altered the tabs further on the fabric version.

I printed the pattern out on transparent paper, started tracing it and its boning channels onto a linen fabric and sewed parts of the outline and all the boning channels.

Then I measured and cut the 174 (!) bones (1/5 inch – 5mm plastic boning), rounded off the edges and stuffed them into the channels. 174 times.

Judging by the few pictures I have of the Swedish court bodices (the only place where anyone bothered to photograph the insides of a court gown bodice), that number must somewhat close to the original. (The width of my boning channels does match up with regular fully-boned 18th Century stays.) Maybe the bones/boning channel are a bit narrower than mine but not by much if at all.

02

Not pictured: the boned shoulder straps.

I also added a thick horizontal metal bone and a busk to the inside of the front bodice and evened everything out a bit by adding some interlining.

P1050171.JPG

I am currently working on at putting these parts together. It’s sloooow because the boning gives the whole thing a very special dynamic.